Electric Minibike Conversion
Get Amped up for a wild ride.
We Converted a Minibike to Electric
Why? Well we had the idea last year to try an EV car conversion. But we didn't have money, garage space, the correct tools, the experience, any automotive training or really any of the things required to even change a flat tire. We instead decided to take on a smaller project and convert a go-kart. Turns out, there aren't a whole lot of cheap options for go-kart frames, and they still take up a lot of garage space. We shrunk the scope one more time and decided to start with a mini bike frame. It takes up much less space than a 4 wheeled frame, it's lighter, and cheaper to find.
The Budget
This project started near the end of 2020, so budgets were tight. We wanted to keep the whole project as cheap as possible, and got to $1200 as the max amount we felt comfortable spending.
The Parts
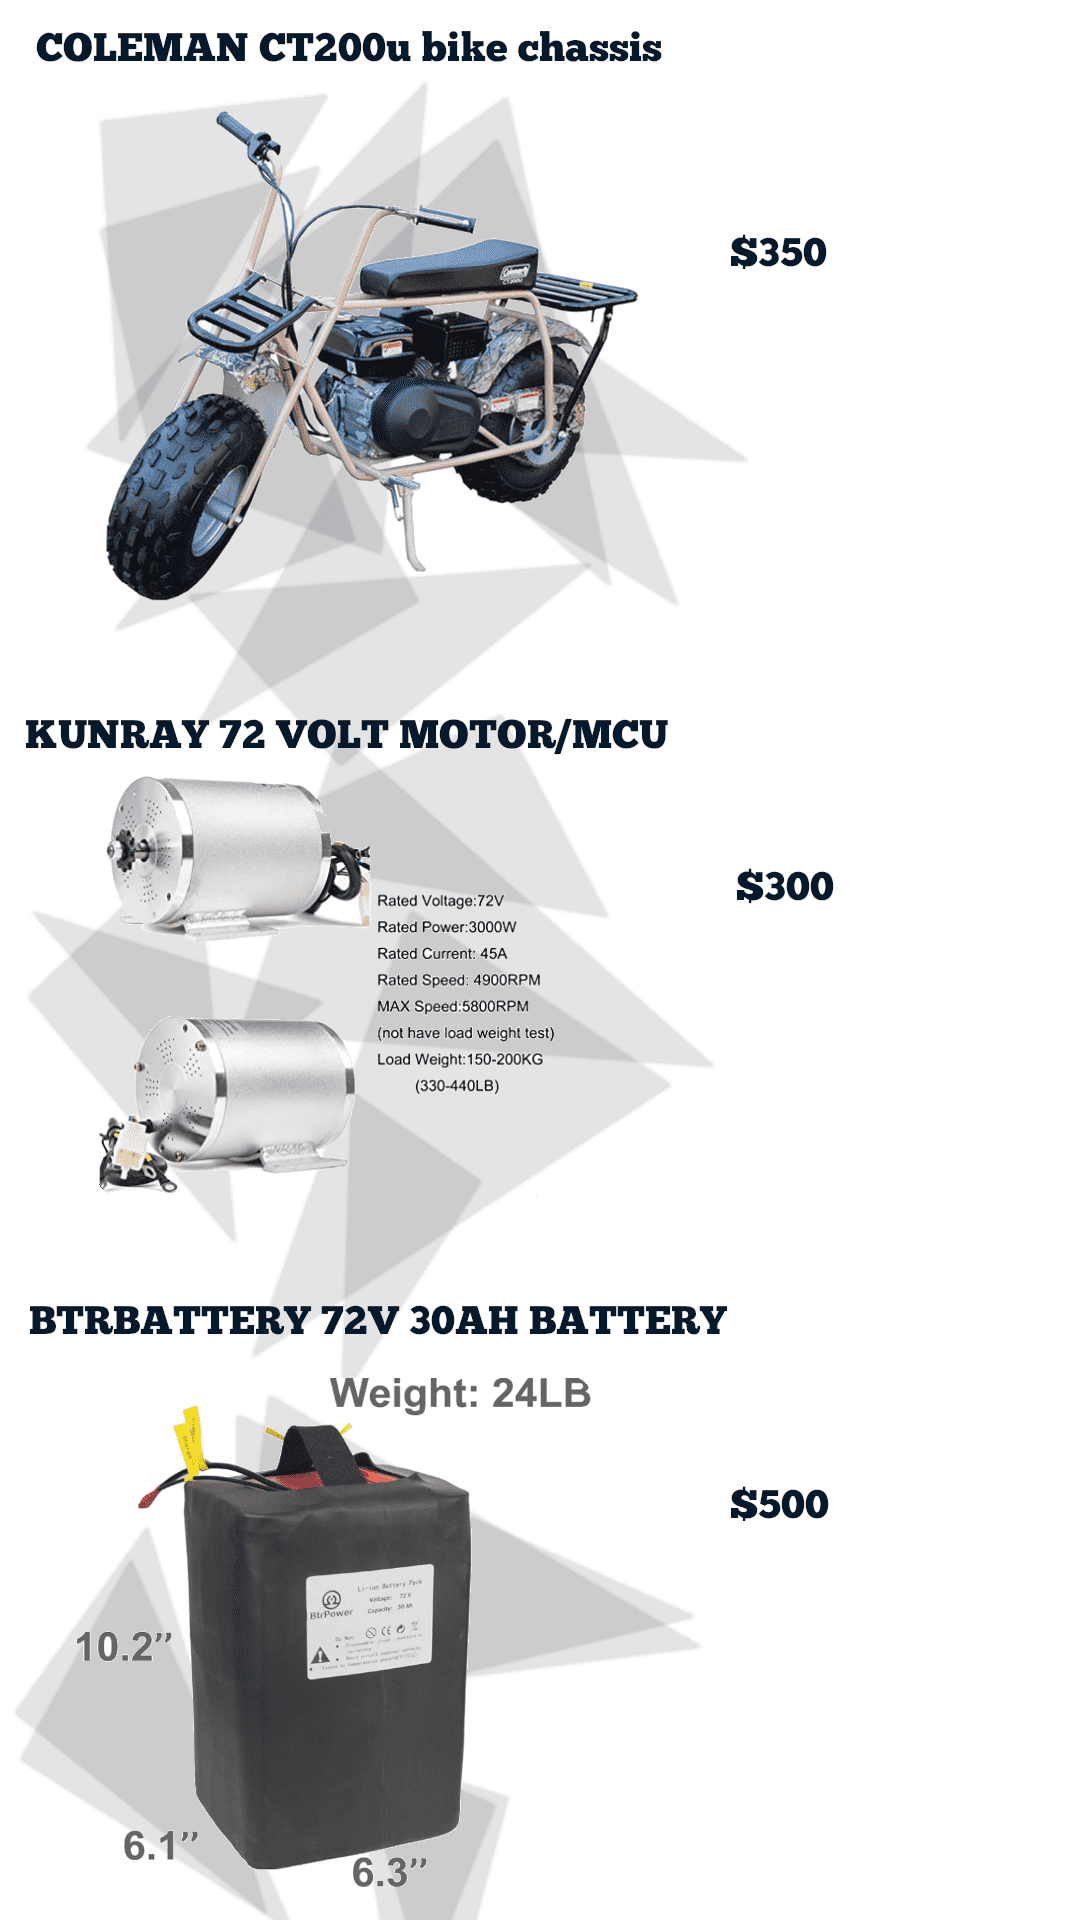
On top of the top 3 most expensive parts, we also purchased a new brake, some wiring, fuses, paint, and other pieces of hardware.
Design Process
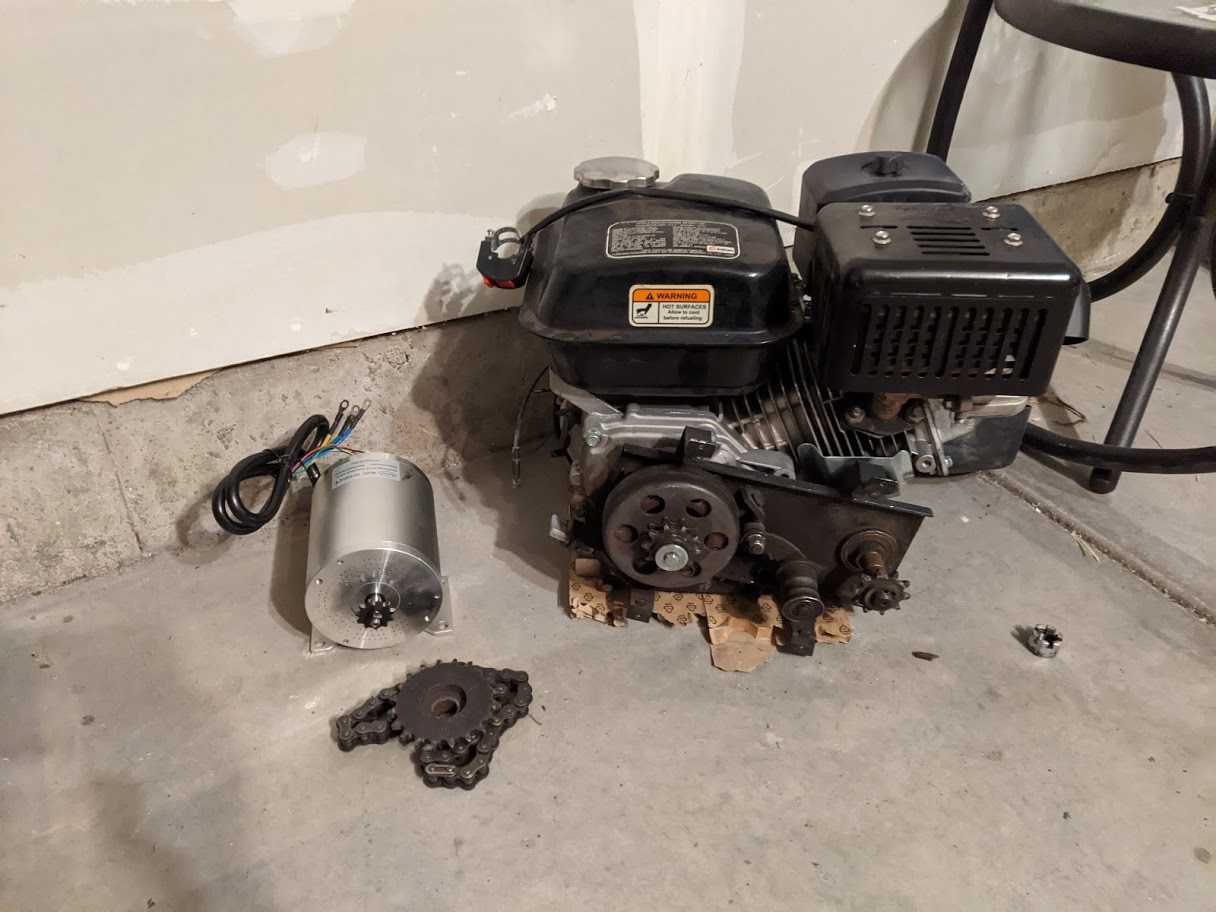
I stated this before, but to reiterate, none of us had any experience with automotive engineering. To make up for this shortcoming, I watched several hours of youtube videos going over topics such like other EV conversions, motor operation, battery management, electronics 101, etc. We started the process to buy parts by getting the weight of the bike and determined that we would need the 72v system to make sure we would have the power to get it moving with a rider. I think we could have used a 48v system (its a lot easier to get battery solutions for a 48v system), but it didn't hurt to have some extra power. Initially, We had planned to mount the electric motor using the motor mounting plate that the bike frame had. However, it turns out the motor is much smaller than the old engine.
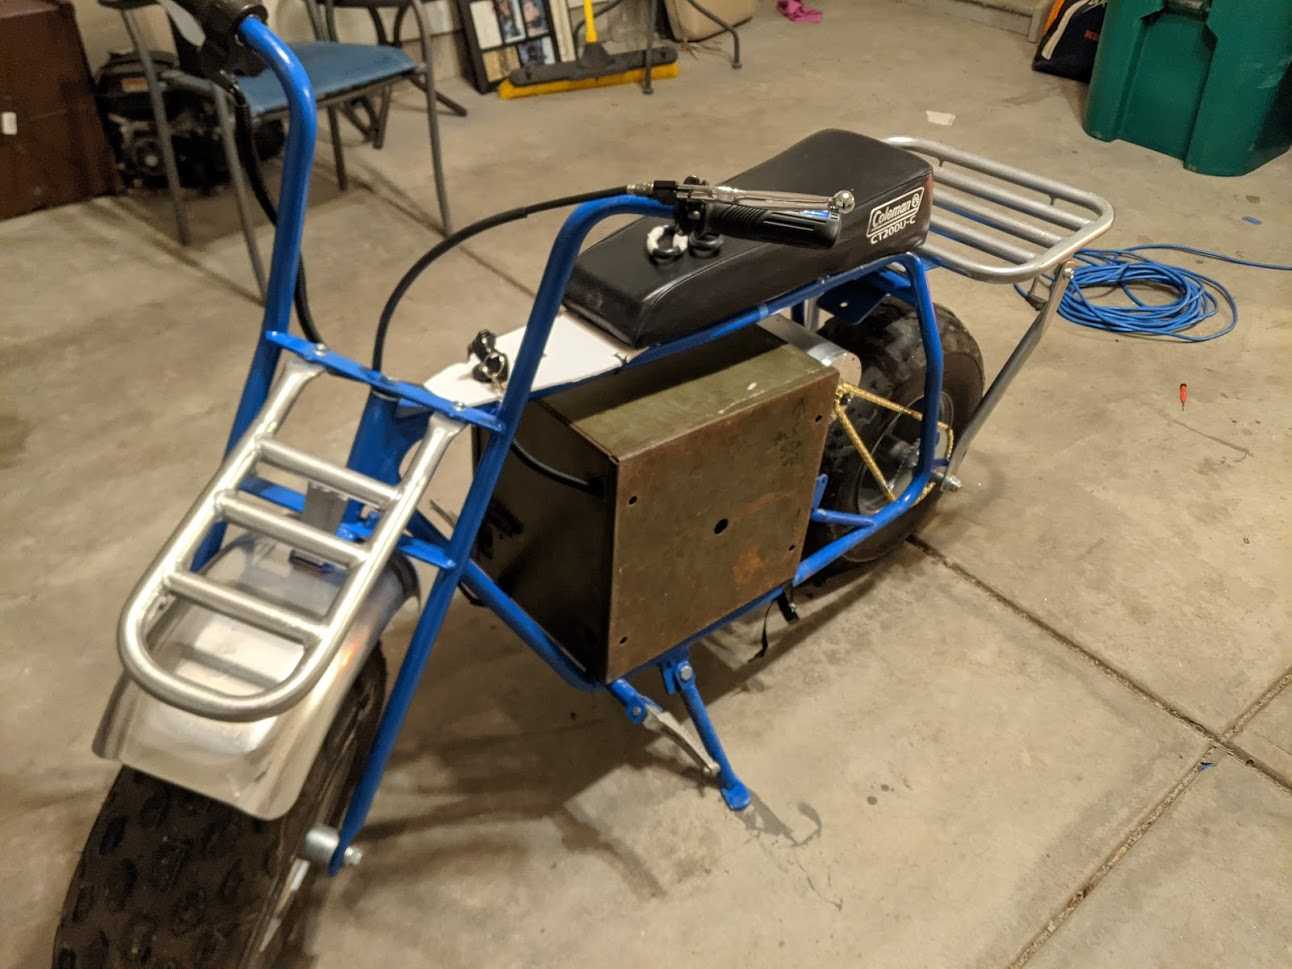
We still decided to mount the motor to the frame in the same location, even though that came with its own issues. First, the chain would have to be almost twice as long. Longer chains have more issues with tension. Next, motor would take up most of the available mounting space, which took away room for the battery and motor controller (MCU). The battery alone weighs 24 lbs, so we couldn't exactly just zip-tie it to the bottom rail below the seat. We don't have the knowledge nor the tools to do much metal fabrication, so we had to come up with a solution that would allow us to safely house the battery and also support the motor.
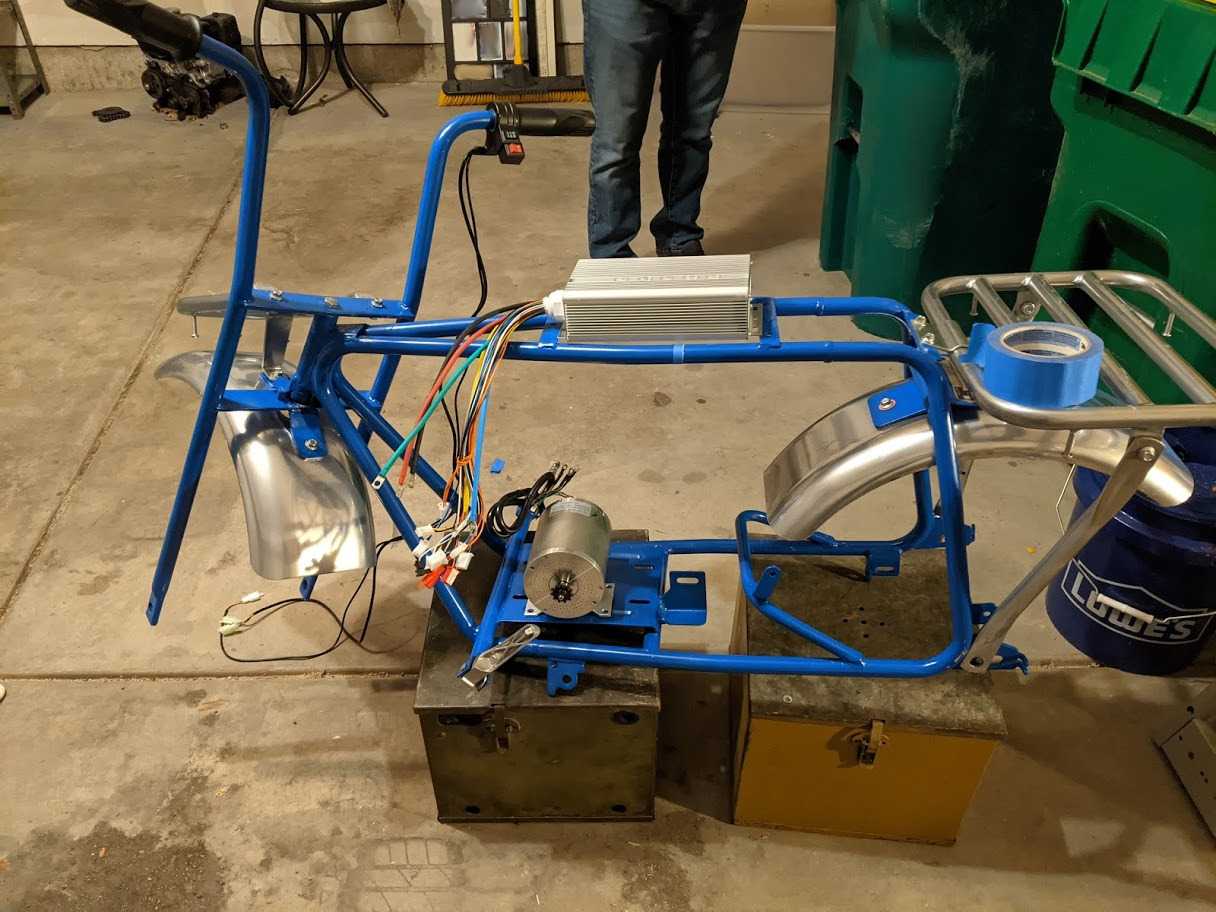
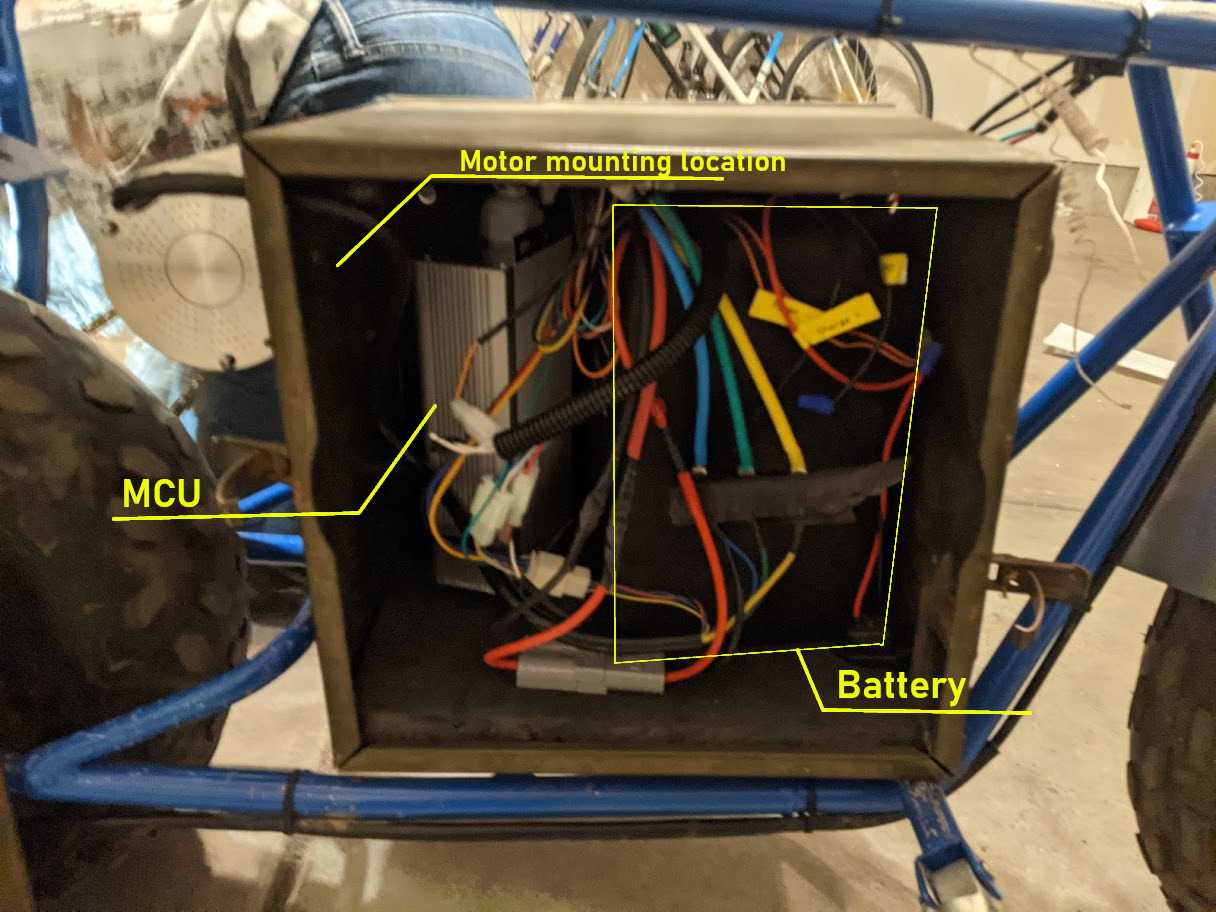
Our solution was already supporting the bike. I had a couple old military storage crates in the garage that we had been using as stands for the bike while we worked on it. These things were tough, made of steel, and had a convenient size that would fit well within the chassis. We removed the motor from the motor mounting plate and instead attached one of the boxes from Uncle Sam, then mounted the motor to the side of it. The finalized design would probably fail a wind tunnel test, but allowed us to have a sturdy structure to house all of our components and a convenient mounting location for our motor.
I can already hear the complaints about wire management, don't worry. This was just a fit test, after we got the electronics wired up and functioning, we cleaned the wiring up.
Project Assembly
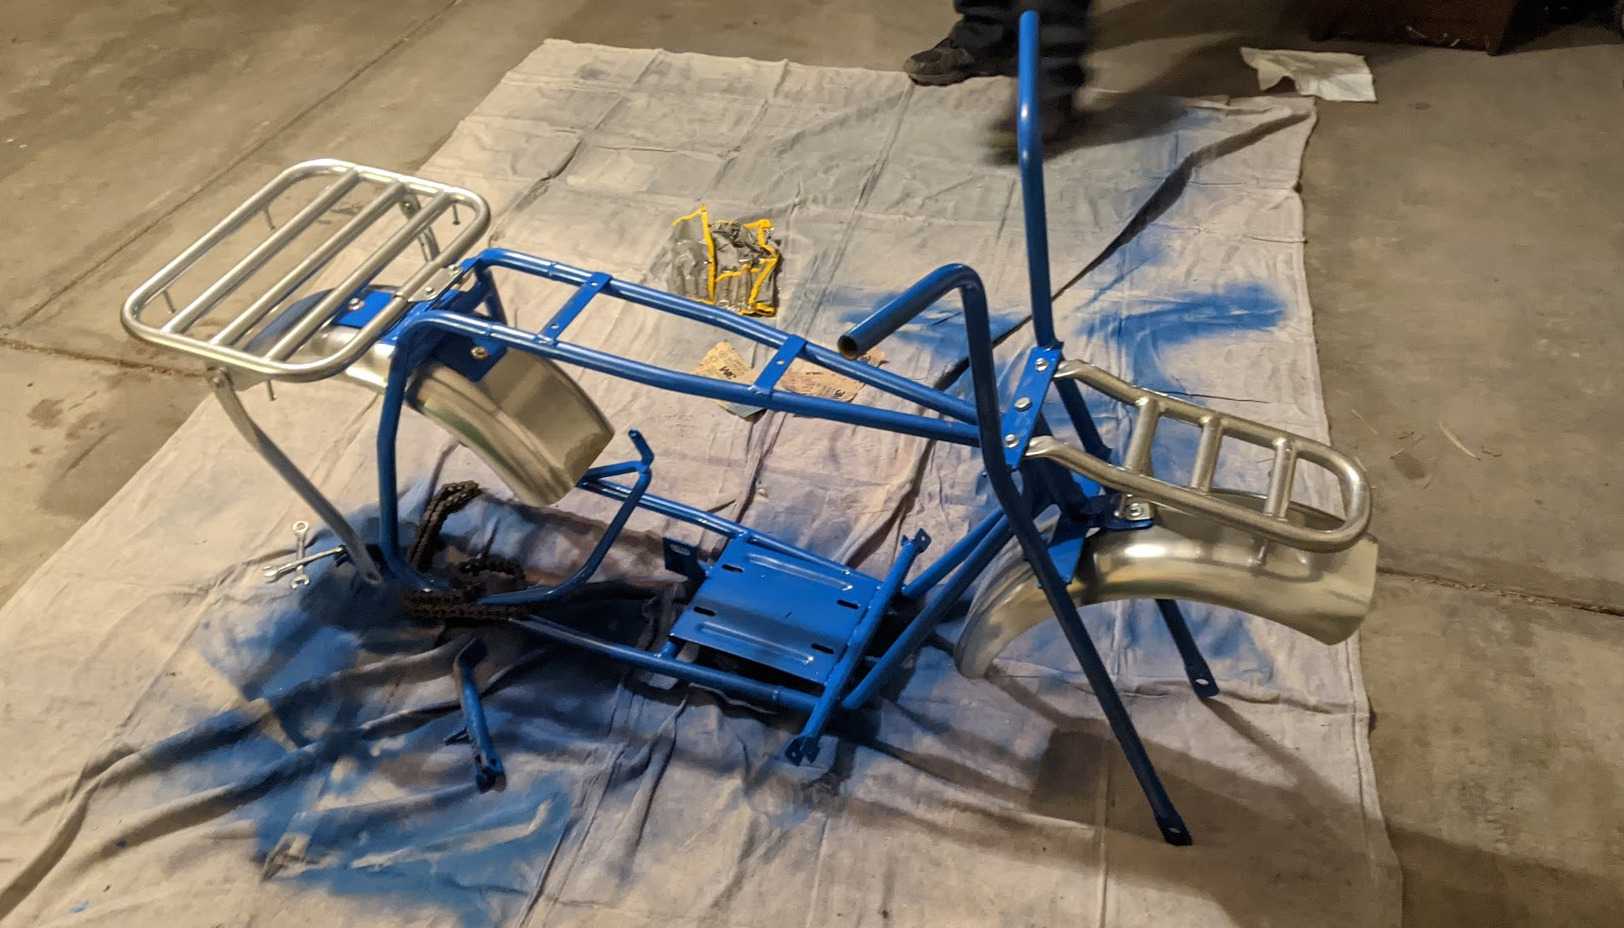
We met up in my garage after work when we got parts in to work on this. Tools used consisted mostly of wrenches, screwdrivers, a drill and a soldering gun. When we got the bike initially, we disassembled it, cleaned and sanded the frame and mudflaps. The sanding removed as much of the camouflage paint job as possible. After sanding, we painted the components a nice blue and silver combo. (painting the crate is TBD).
We didn't splurge on the paint job, and just used two cans of spray paint. Its not the nicest finish, but it is way better than the camo that this thing shipped with.
After painting, we looked at the existing components on the bike like the brake and wheels. The wheels were in good shape, but the brake grip had broken, so we had to install a new one. fortunately, that seemed to be the only thing we would need to replace from the base frame.
The Chain
Few components for this build gave us as much grief as the chain. We opted to use the chain and sprocket combo that came with the motor kit. There are very few sprockets that fit our motor, so we would have to manufacture our own fitting if we wanted to use a different chain. The chain was a rarer T8F variety. more than once, I bought the wrong size chain and I had to buy 2 different chain breaking tools because the first was too cheap to work properly. This part alone took several weeks to get right. Once we finally got everything linked they way we needed, it was time to move on to the battery.
The Battery
There are surprisingly few suppliers of small vehicle 72 volt batteries. In order to get a power source for our project, we would either have to 1. Buy one from one of the few providers or 2. build it ourselves. Battery design wouldn't have been that bad, we could have just gotten some 12 volt cells and linked them up and purchased a simple BMS. However, that added much more complexity to the project, and for our first project like this, we decided it was better to just get one that worked right out of the box. Working out of the box, however was contingent on the box actually arriving.
I ordered the battery on Amazon from btrbattery. It was coming from China, so the shipping was going to take at least 3 weeks. I was quite surprised when I received an email saying it had arrived early. To the wrong address. In the wrong state. There had been some sort of kerfuffle in the seller's system that caused them to ship the battery to somewhere in Birmingham Alabama, or about 2,000 miles away from where I live. After some talks with customer support, I ended up getting a new battery a week later. I reached out again to customer support when the charger that shipped with the battery didn't work. As of writing this, the charger still doesn't work, and we haven't heard back.
The MCU and Motor
The motor kit was easy enough to figure out. there were a bunch of cables that were labeled with what goes where. There is one issue we are working on where the motor is "in reverse". It's set up to run opposite of the way it's set up, meaning to move the bike forward, the motor has to be in reverse, and that limits the power to 50% of the total throttle speed.
Putting all the electronics together didn't take very long, or require much effort. Biggest thing I can say about this step was safety was the most important part of it. There were a lot of wires and a lot of amps. If anyone else is working with a battery with 72 volts and a max draw of 50 amps be VERY careful. Shorting out the battery on exposed skin can cause serious damage, but more importantly, it can destroy the $500 battery you waited 6 weeks to get.
Conclusion
There is still a lot of testing to do on the project at this point. We were able to get the whole thing assembled, and tested. It runs but we have one issue we need to solve for before we can put it through its paces. The crate warps when there is a high amount of torque applied which is causing the chain to slip. We are looking to fix this by adding some extra braces to the inside of the crate. There are some other projects that we will be working on as well, including installing a breaker between the battery and the MCU and a suite of gauges on the dashboard.
